Microlaryngoscopy with Lesion Biopsy
Microlaryngoscopy with biopsy involves direct visualization of the larynx using a rigid scope under general anaesthesia. It is commonly performed for evaluation and diagnosis of laryngeal lesions.
Relevant Anatomy
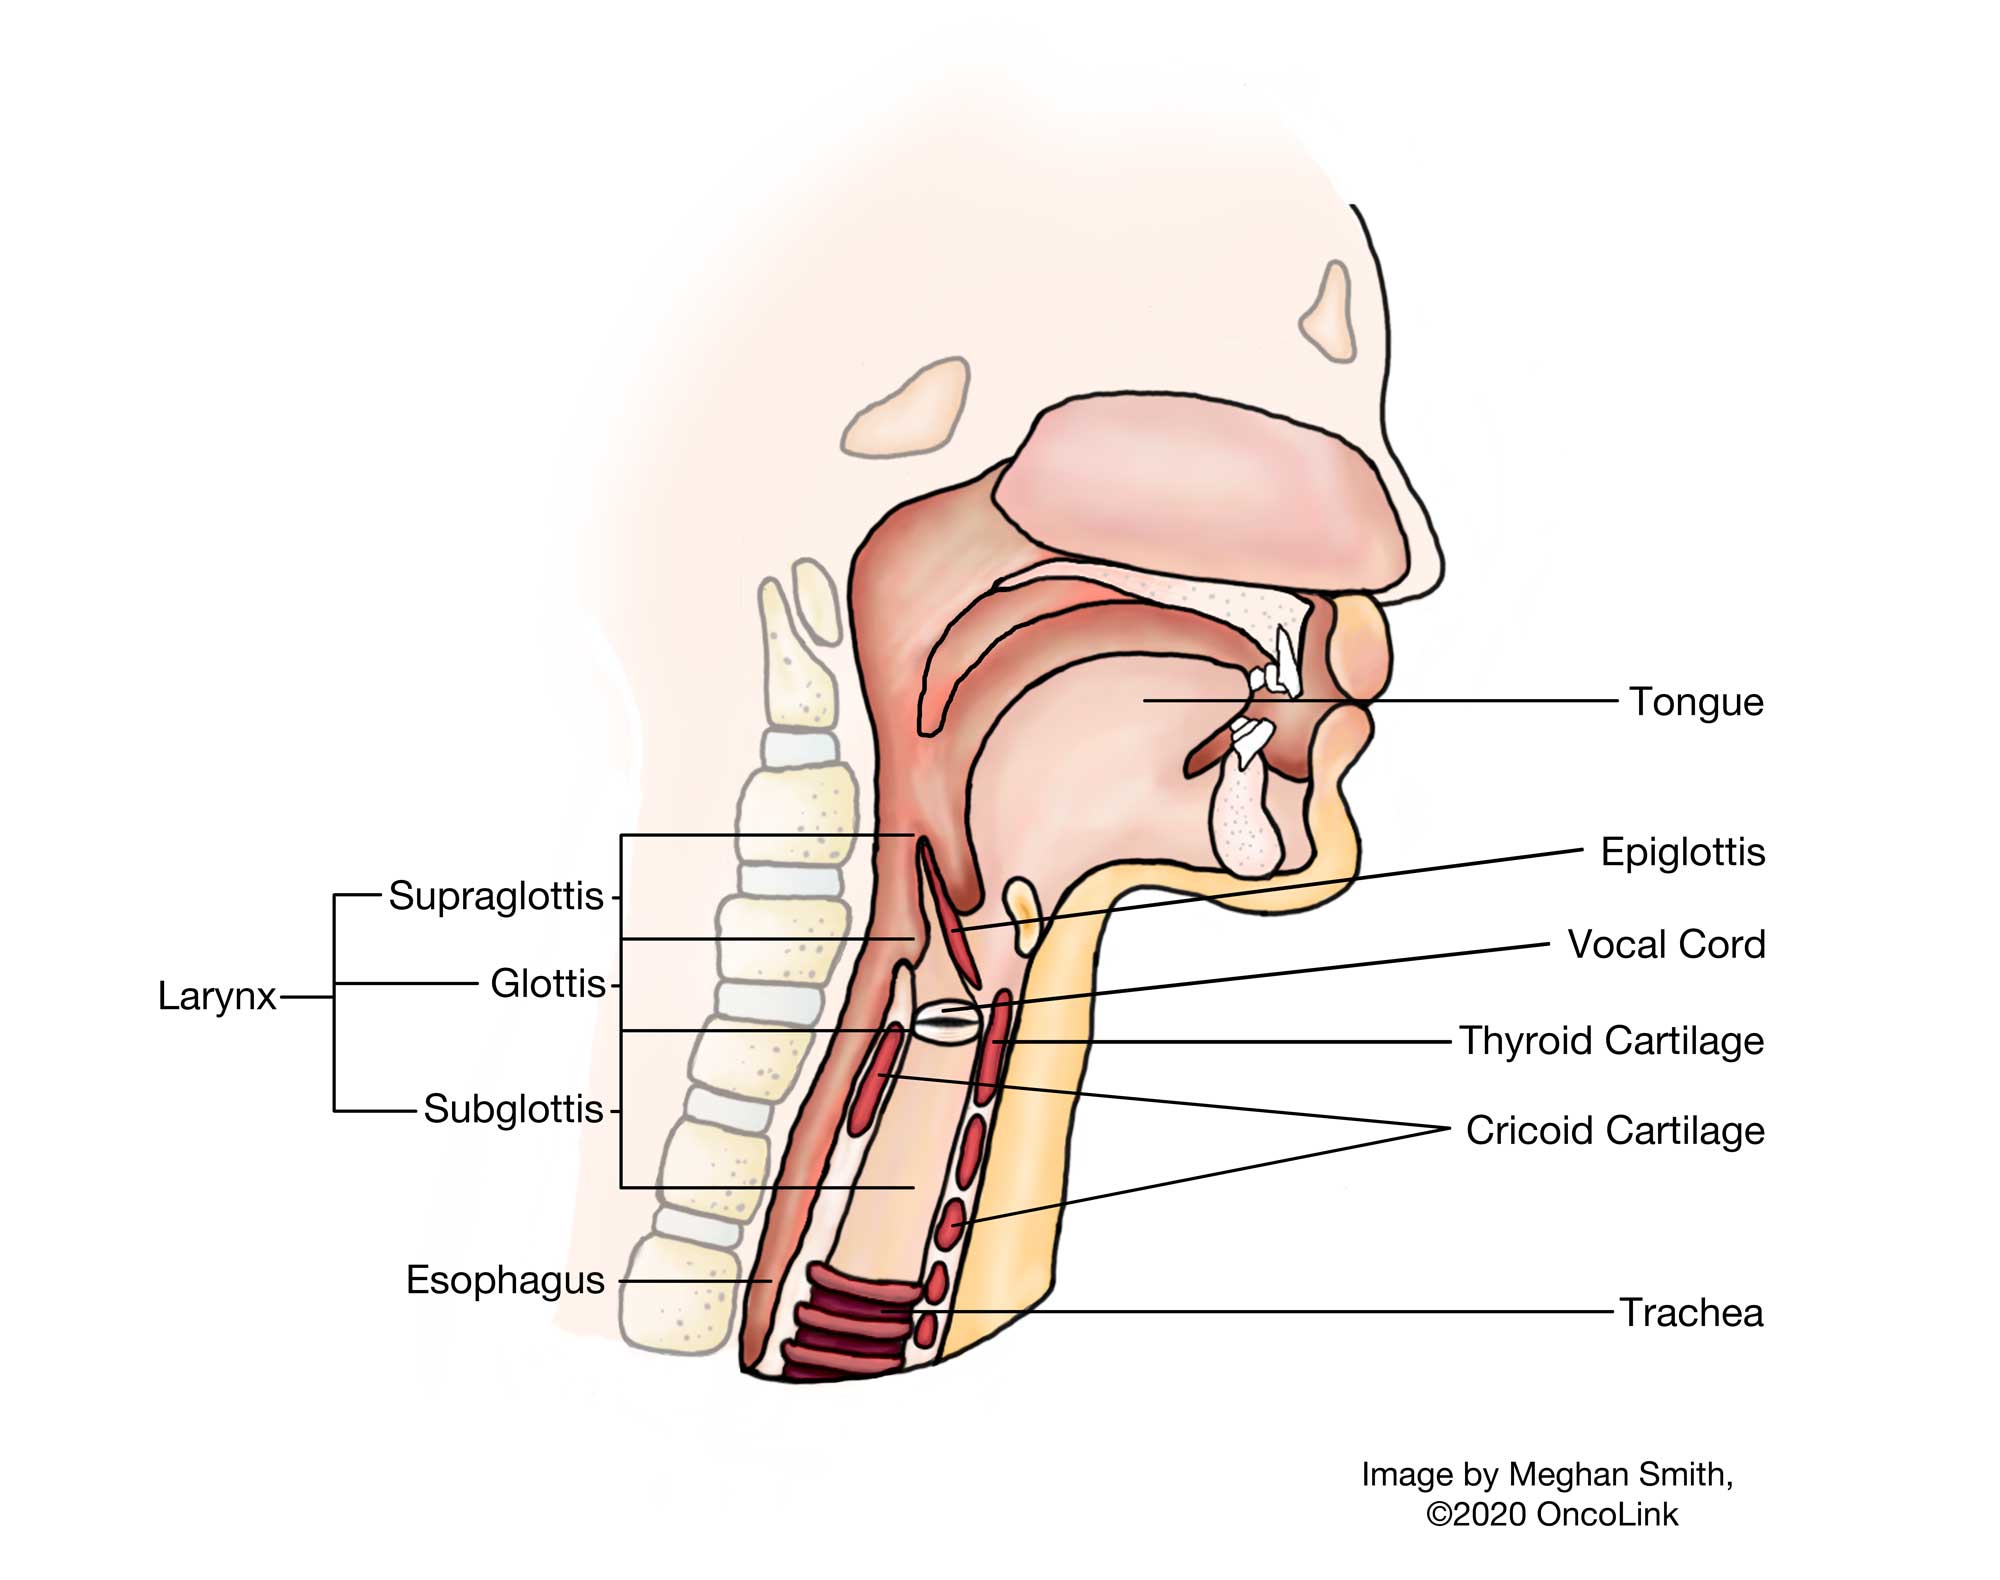
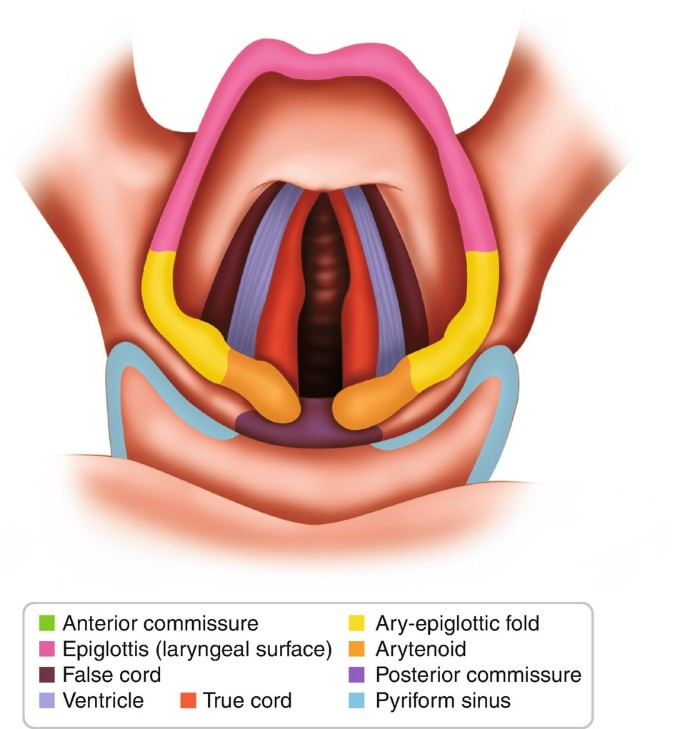
The procedure focuses on the laryngeal structures, including the vocal cords, false cords, arytenoids, epiglottis, and surrounding mucosa. Understanding of airway anatomy and surrounding neurovascular structures is essential.
1. Instruments and Equipment Checklist
Basic ENT Tray (Sterile)
- Scalpel blades (No. 15)
- Fine Metzenbaum scissors
- Tissue forceps (microsurgical, bayonet-style)
- Needle holders (fine)
- Suction (Frazier tip)
- Electrocautery (fine-tip or bipolar)
Specialised Instruments
- Operating microscope (ENT specific)
- Microlaryngoscope with suspension system
- Microlaryngeal instruments (e.g. microlaryngeal scissors, cup forceps)
- Laser (e.g., CO₂ laser) – if applicable
- Video recording/monitoring system (optional)
Sutures
- Typically not required unless a bleeding lesion or repair is needed
Other Equipment
- Tooth guard
- Bite block
- Patient positioning donut or head ring
- Antifog solution and warm saline for scope
- Saline for irrigation
- Sterile gauze and suction setup
Fluids and Medications
- Antibiotics: As per surgeon preference (often not needed)
- Saline: For irrigation and lens cleaning
- Adrenaline solution: Topical vasoconstriction (1:10,000 dilution)
- Local anaesthetic: May be used for topical spray (e.g., lignocaine)
- Steroids: IV dexamethasone to reduce laryngeal oedema
Anaesthetist's Role (General Anaesthesia)
- Secure airway using either an oral RAE endotracheal tube or laser-safe tube
- Maintain deep general anaesthesia with IV induction and inhalational or TIVA techniques
- Ensure immobility to facilitate precision instrumentation
- Protect airway from aspiration during lesion biopsy
- Monitor for airway compromise post-procedure (risk of oedema or bleeding)
- Coordinate ventilation interruptions (apnoeic or jet ventilation if required)
- Administer dexamethasone and antisialagogues as needed
2. Before Knife to Scope
- Confirm patient identity, fasting status, and consent
- Initial count of swabs, instruments, and sharps
- Confirm microscope, suspension system, and microlaryngoscope setup
- Ensure endotracheal tube is well secured and out of surgical field
- Apply tooth guard and drape with fenestrated head drape
Prepping and Draping
- Minimal skin prep is needed; focus on oral cavity if using antiseptic rinse
- Position head in mild extension with ring or headrest
- Use clear adhesive drapes if laser is employed (for fire safety)
3. Intraoperative Stages
- Exposure: Insert and suspend microlaryngoscope; visualise vocal cords using microscope
- Lesion Inspection: Assess lesion under high magnification
- Biopsy: Excise lesion or take biopsy using microlaryngeal cup forceps or laser
- Hemostasis: Achieve using adrenaline-soaked pledgets or electrocautery
- Specimen Handling: Label and send to pathology as per protocol
- Closure: No suture needed unless unexpected bleeding or repair required
4. Post-Op Tasks
- Final count of swabs, sharps, and instruments
- Carefully remove suspension and microlaryngoscope
- Inspect airway before extubation
- Ensure specimen is correctly labeled and documented
- Hand over to PACU staff with anaesthetic summary and airway status
- Advise voice rest and post-op instructions as per ENT surgeon